Monday, April 2, 2012

"Anything but Square" Challenge

To make a cohesive display each quilt should start with a square (12” x 12” finished size). Your “not square” part can go in, on, or maybe under the black square.


Maureen Ashlock
“SCOPING THINGS OUT”


The design for this kaleidoscopic image was achieved with a custom paper piecing pattern. A circle was traced around a 10” dinner plate and divided into eight wedges. After drawing several red lines across the whole circle, 2 mirrors were placed to check each wedge for their kaleidoscopic effect. One wedge design was chosen, and line designs were made with a ruler inside the three red line sectioned areas. After photocopying the wedge, several copies were made to try several variations using colored pencils. After selecting the best combination, the three sections were numbered for paper piecing. The design consists of 24 sections that make up the 8 wedges and not a square in sight!


Lettie Blackburn
“2 HIP 2 BEE SQUARE”


The theme, "Anything But Square", inspired me to make my 12x12 commenting on the sociological label of "square", used to describe a person in the '60s who was not "hip"...which lead me to think of the Huey Lewis song, "Too hip to be square" The resulting piece illustrates that song... two hips, two bees and the mathematical sign for square. Thus...it is "anything but square".


Carol Bormann
“TRIANGLES, PYRAMIDS and UNICORNS”


The sheer pyramidal teabags recently discovered in a newly purchased box of tea became the inspiration and ideal use for my newest found-objects! A two-dimensional graphic consisting of a triangular grid was created in Photoshop for the foundation of the design. The image was then digitized so it could be machine embroidered. The analogous palette of the rayon-embroidered triangles became vibrant against the black background. The dried used teabags were emptied via a slit in the bottom of the pyramid. After rinsing, drying and removing the tag and string, the organza like forms were tacked at the lower corners to a triangle on the base creating a three-dimensional, translucent effect.


Dianna Callahan
"SQUARE TO ROUND"


The term “Square to Round” is common in basket making. Since the piece is woven, it seemed an appropriate title.

This experimental piece allowed me to use another technique in addition to quilting. It turned out well enough not to repeat. I chose to weave the top fabric into the black background fabric, and to complicate things, I did it on the curve. The finishing touch was bo-nash foiling.


Dianna Callahan
“COUCH PO-PLAITO”


This second piece is also experimental. I plaited an organic shape across the black square with handspun yarns which are also "woven" into the background in a few places. I also couched some organic shapes onto the black and finished it with bo-nash foiling. The name is a fusion of couching and plaiting (the technique used) and a play on the phrase "couch potato".


Cathy Jeffery
“KNOT SQUARE”


Knots and buttonholes form not only decorative elements but some serve as attachment devices for the three colorful shapes.


Roberta Ranney
"JERRY LEE LIZARD IS ANYTHING BUT SQUARE"


Being a child of the 60's, the word "square" means “uncool” to me. That led my mind to a quilt I made several years ago with a frilled lizard playing the piano. He is a rock 'n' roll sort of guy. So I made a small piece using the same idea. This little quilt makes me laugh and I think we could all use more of that.


Lily Kerns
“DESCENDING CIRCLES”


A single piece of inexpensive fabric was the inspiration for this piece. Various media and surface techniques affect the texture and reflective quality of the circles.


Donna Olson
“NIGHT MOVES”


This colorful frog intrigues me. I was going for a stark contrast against the black background.


Emmie Seaman
“DIAPHRAGMS”


My 12 x 12 was made by sewing 3"x3" squares out of as many black fabrics as I could find in my stash. The image is a silk organza pojagi experiment with poly circles sewn to it. It was sewn to the black background and the black cut away behind it.


Diane Steffen
“MARDI GRAS”


An old unfinished project was discontinued and the parts reassembled to create this piece. The colors remind me of a party and it was during the time frame of the parade in New Orleans, so Mardi Gras became the title.”


Lucy Silliman
“CORAL JEWELS”


When scuba diving I notice that so often the corals are more brilliant than the fish are.


Merrilee Tieche
“ANYTHING BUT S-S-S-SQUARE”


When Lily told us of the theme “Anything but Square”, I immediately began to think of sinuous shapes. Thos ideas coalesced into snakes of many colors.

Tuesday, March 6, 2012

How To Mount Your Quilt on a Canvas

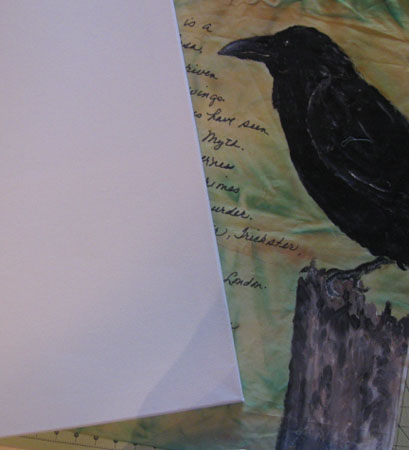
I have had really good luck lately mounting my art quilts on ready made canvasses.  This technique is borrowed from Susan Carlson (always one of my muses) as shown in her newest book, Serendipity Quilts.  While the additional support of the canvas itself will not be there, I believe the same result can be had using stretcher bars.  This technique does away with the usual bulky edges and provides a smooth transition between the quilted fabric and the sides of the bars. 

1.  Gather supplies for stretching your quilt on bars:
  • Purchase pre-made canvas or stretcher bars in the appropriate size for your quilt.
  • Staple gun with 1/4" staples
  • Cutting board, ruler and rotary cutter
2.  Trim your quilt to the correct size:

     To determine what size to cut your quilt, if you are going to maintain a 1/4" seam allowance, add 1/2" to the dimensions of your canvas or stretcher   
     bars.  In other words, if your canvas is 18" x 24", trim your quilt to 18 1/2" x 24 1/2". 

3.  Cut edging strips:
   
     Cut the chosen edging fabric into 4" wide strips if working with a regular 3/4" deep canvas.
     Sew enough strips end to end to get the length needed for the circumference of the frame.
     Turn one of the 4" ends under by 1/2".  With right sides together, line up the strip to the bottom
     edge of the quilt, placing the turned end a few inches from the corner.

4.  Sew along the first edge, pivot on needle and stitch down the next side

     Maintaining your 1/4" seam allowance, stitch along to a seam's width (1/4") from the corner.  Sink
     your needle and lift your presser foot.  Pivot the quilt and line up the presser foot to the second
     edge.  Lower the presser foot, easing the excess edging fabric to the inside, out of the way of the
     needle to keep from sewing through the edging fabric.

     Keep on stitching the edging strips to the quilt the same way on all sides.  When you get to the end,
     sew over the turned down first edge and cut the strip an inch or so beyond that.


5.  Turn raw edges under and stple to back of stretcher bars

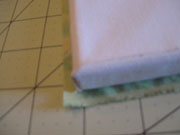
     Ease the quilt over the top of the stretcher bars.  It works best if the seam allowance faces down the
     side - away from the quilt itself.  Lay the piece face down on your table.  Turn the raw edge of the
     edging strip under, roughly in half, so the now-folded edge meets the inside edge of the stretcher
     bar.  Keep the seam line centered on the edge of the canvas and  begin to staple the edging strip to
     the stretcher bar.  Begin in the center of each side and work toward the corners, stapling once on
     the first side, then once on the opposite side, then  the third side and last the one opposite that.
     Maintain this rotation as you staple to create even tension all around.  Turn the corners in a neat
     miter and staple a couple of times diagonally. 


Screw in a couple of eye hooks to the insides of the stretcher bars, roughly a third of the height of the bars, and twist hanging wire through each side.  Cover your twisted part, wrapping masking tape around it.  It can be hung as is, or placed in an open frame. 

If you need better directions than this, consider buying Susan Carlson's book, Serendipity Quilts.  She gives much better directions than I do, and the book is a phenomenal inspiration, besides.


Sunday, February 26, 2012

Book Review of Artistic Photo Quilts
by Charlotte Zeibarth


Charlotte is wild about her computer!  More specifically, she is wild about what can be done with Adobe Photoshop Elements on her computer.  This is a precise, step by step, how-to book, though it is not project oriented.  Starting with tips on selecting a digital camera (not as expensive as you might think) to how it relates to your computer.  Being careful to make sure that someone without a lot of computer experience can follow her directions, she stresses learning to experiment with all your options for altering your original photos.  A warning is issued - it could become habit forming!


The first portion of the book is devoted to photography.  You will no longer be looking for beautiful composition in your pictures.  Subjects that offer texture and contrast take on new meaning.


Next Charlotte walks you through the namy ways to alter your photos.  At the end of each topic, there are exercises to help you practice.


The book ends with helpful ideas for applying all your newly learned photo transfer knowledge into making a beautifully finished quilt.


Each page is filled with vivid color photography. One can easily see the changes that take place as she walks you through the steps for altering your photo.


Artistic Photo Quilts is concise and well written.  Those wanting to do more than just photo transfer family portraits will be delighted.  However, I think even an experienced photo-transfer artist can gain some new knowledge. 

Wednesday, January 18, 2012

Music Challenge

Our challenge due in January was provided by Donna Olson.  She asked that we make 12" x 12" quilts inspired by the theme of music.


A LITTLE DITTY
by Cathy Jeffery

Cathy's piece features some of the decorative stitches from her sewing machine.  She said "music totally inspires me....It's one of the most important things in my life."


NOTATIONS
by Diana Callahan

Diana found this challenge to be a good way to use the wonderful fabric with the musical score and script that she has had for several years.


NOTES
by Diane Steffen


SONG SUNG BLUE
by Donna Olson

Donna printed a photo of her grandson,  Burke, on fabric and added a border and quilting to create a lovely fabric portrait.  It is a picture of him singing at his mother's 50th birthday celebration.


THE MUSIC OF THE SPHERES
by Lily Kerns

The title comes from an old hymn,  "This is My Father's World". The piece itself was inspired by photographs from the Hubble spacecraft.  It is hand beaded on microwave dyed silk.


BLUE NOTE
by Lucy Silliman

My piece was a technical challenge of producing a piece with holes in it. The notes seemed to interlock effortlessly as notes do in a great piece of music. "Blue Notes" was a fun experiment that almost designed itself.


IN MY MIND
by Maureen Ashlock
I chose Phantom of the Opera by Andrew Lloyd Webber because I like the music and have seen the play and the 2004 movie. I digitized the embroidery and listed the major songs. The name is "In MY Mind" as I have been humming the music as I sew patches on the silk quilt I am restoring right now.


THE RICHEST CHORD
by Roberta Ranney
 This is my attempt to make a picture from a sound.  There is a chord in the last movement of the Moonlight Sonata that seems to contain all the wonders of music and this is my depiction of it.

STAGE DOOR
by Sheryl Schleicher
Sheryl's work shows the less glamorous side of musical performance.  Out front everything is bright and colorful but all of that is absent behind the stage.
A NIGHTINGALE SINGS
by Emmie Seaman
This is from the title of "A Nightingale Sings in Barkley Square".  She is beaded and her blue wings are metallic.

STRING RHYTHMS
by Carol Bormann
The fragmentation of shapes and colors represent the staccato sound of plucked strings. I digitized my graphic image and converted it to "stitch language" to create this rayon machine embroidery on black cotton. Both my daughter and I played the violin in school; our son played the string bass and currently plays the guitar in a band called "Rock Show". It seemed fitting to dedicate the piece to stringed instruments.

ROCK AND ROLL
by Lettie Blackburn
Lettie says that she enjoys "all kinds of music, from opera to zydeco, but I was a teenager in the 60's, so rock and roll clearly defines music to me!

EAR WORMS
by Merrilee Tieche
Merrilee's piece says "do you ever get a song in your head and it won't go away?"
She says "while I am not very inspired by music, I often do get a song stuck in my head and sing it (badly) all day!

Wednesday, October 26, 2011

Peaceful Waters Challenge

Our challenge due for October was offered by Roberta Ranney. Inspiration was to come from a song composed by Bob Ranney in 1974 called Peaceful Waters.


There's a rhythm in the water flowing by
There's a rhythm in the wingbeats in the sky
Can't you feel it.  It's a thing called life
Peaceful waters flowing by

You can see it in the oaks against the sky
You can hear it in the whip-poor-will at night
You can feel it with the heron in its flight
Peaceful waters flowing by

You can see it when you close your eyes
But you can't see it when you close your mind
Don't you know we're so far behind
Peaceful waters flowing by

Chorus: 
Peaceful waters flowing by
Deep green forest reaching up to the sky
Don't you know your soul can't die
Peaceful waters flowing by


                                               Vigilant Wader by Carol Bormann


                                                  Sac River by Dianna Callahan 


                                                Open Your Mind by Cathy Jeffery


                                               Autumn Waters by Lettie Blackburn


                                                Rain Forest by Lily Kerns


                                              Mountain Air by Donna Olson


                                                   Heron by Roberta Ranney

                                              Heron on the Water by Emmie Seaman


                                                      Imagine by Diane Steffen


                                                 Soaring by Maureen Ashlock


Peaceful Waters by Lucy Silliman


                                             Peaceful Waters by Merrilee Tieche


.